0
Design a Rusted Metal Face Manipulation with Abstract Falling Lines in Photoshop
Posted by Unknown
on
8:47 PG
in
COOL GILER
In this tutorial, I will show you the steps I took to Design a Rusted Metal Face Manipulation with Abstract Falling Lines in Photoshop. The Aim of this tutorial is to cover some interesting techniques when it comes to applying textures to human skin, as well as creating simple abstract lines via the Warp Tool.
This is a beginner-intermediate level Photoshop tutorial.
Note: The Photoshop tutorial is done in CS6 – therefore some screenshot may have slighting different layout as in the earlier version.
Here is a preview of the final effect I have for this tutorial: (click to enlarge)

Note: If you have trouble doing Step 3, check out this video tutorial below:
PSD File Download
You can download the PSD File for this tutorial via the VIP Members Area for only $6.95/Month (or less)! You will not only get this PSD File, but also 100+ other PSD Files + Extra Goodies + Exclusive Photoshop tutorials there. Signup now and get exclusive :) Find out more about the VIP Members Areas

OK Let’s get started!
To complete this tutorial, you will need the following stocks:
Step 1
Create a new document sized 800px * 1020px with black background, load the model image into Photoshop and cut of the head and shoulder portion of the model, paste it onto our document. Resize and position this layer to the centre, and use a soft eraser to fade the edges as shown below:

Use a small hard eraser to tidy up the hair:

Duplicate this layer once and apply the following Surface Blur settings to it:

Duplicate this surface blurred layer once, then use the watercolour brush we downloaded earlier as eraser, remove parts of the face for some abstract break-apart effect:

Hide the 2 previous layers and keep only the third layer visible.
Step 2
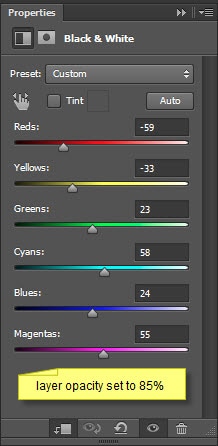
Add the following 2 adjustment layers as clipping mask on top of the third duplicated layer:
Black and White

Levels

Layer mask on the Levels adjustment layer:

and you will have the following effect so far:

Step 3
We will now apply the rusted metal texture onto the face. Open up the texture image in Photoshop, load the selection of the model layer and drag it over onto the texture image:

Copy and paste the selection over onto the model, place the layer above the previous adjustment layers:

We will want to remove some parts of the metal texture to reveal the eyes and nose, etc with a layer mask attached:

Change the blending mode of this metal texture layer to “Hard Light”, you will have the following effect:

Add the following adjustment layer as clipping mask to this metal texture layer:
Black and White

and you will have the following effect so far:

Step 4
We can add fading smoke/cloud around the face to add some depth to the image:

Optionally you can add some small particles around the face to create some break apart effect:

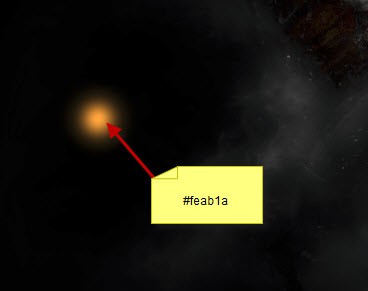
We will make some abstract curvy lines – paint a small orange dot with soft brush:

Use the Warp Tool to manipulate this dot as shown below:

Duplicate this layer a few times, rotate and resize each duplicated layer and scatter them around to form the falling effect:

Attach one line to the bottom of the right eye as well:

Step 5
We’re almost done! For some final retouches, add the following 2 adjustment layers on top:
Curves

Colour Balance
Midtones

Highlights

and you will have the following final effect: (click to enlarge)

That’s it for this tutorial! Hope you enjoy it and find it useful! Till next time, have a great day!
Catat Ulasan